THE RESTORATIONS WITH TORONTO BRIDGE USING OUR AUTOSCAN-DS-MIX DENTAL DESKTOP 3D SCANNER
With the launch of the AutoScan-DS-MIX dental lab 3D scanner, its superior performance and precision accuracy have been trusted by many dental laboratories, who have used this desktop lab scanner to complete complex cases. Today’s case is the Toronto bridge restoration, completed using the AutoScan-DS-MIX.
Case Profile
Implant sites: #46, #44, #42, #32, #34, #36.
Implant system: #32, #42, Nobel system. #34, #36, #44, #46 Dentium system.
Restoration type: Toronto bridge
Material: Titanium
Restorations: #34~#44, ceramic crowns. #35~#36, #45~#46, solidex resin crowns.
Color: #32~#42, A2; #43~#46, A3.
Case partner:Jiahong DentalLab; Shenzhen GoodFeeling.


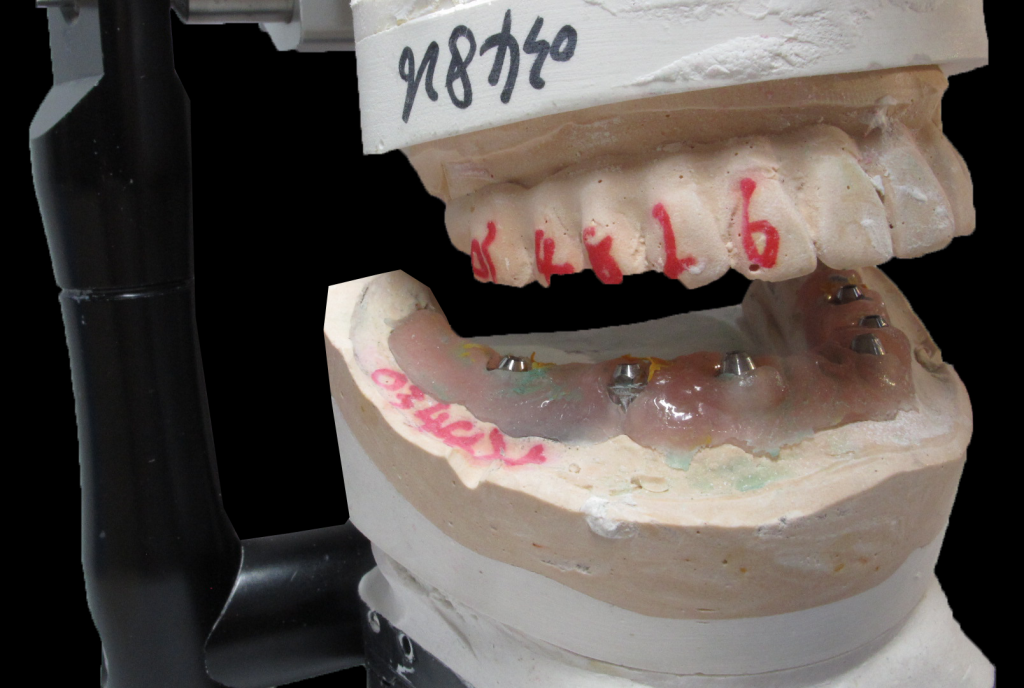
Fig 1,2,3: the model was transferred to articulator
Working Process
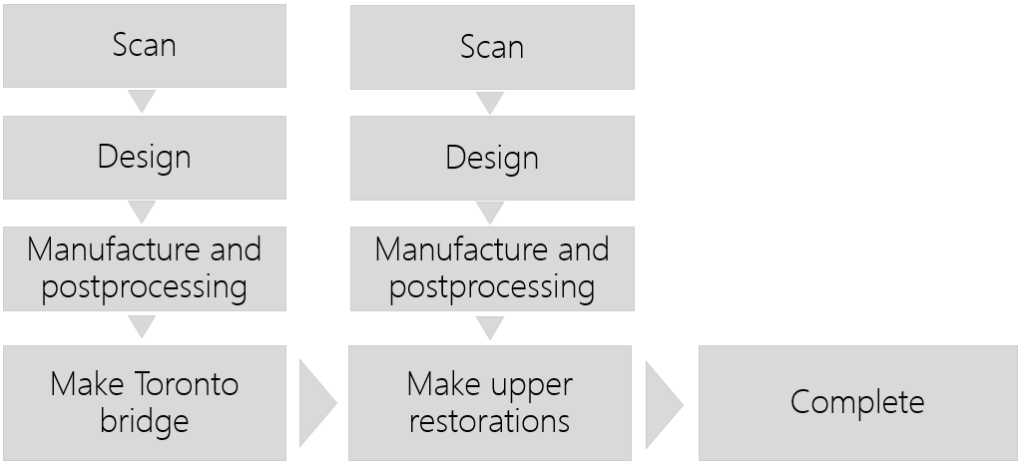
Fig 4:Working steps of this case
1, Toronto Bridge
1.1 Using AutoScan-DS-MIX dental lab 3D scanner to capture the data of model
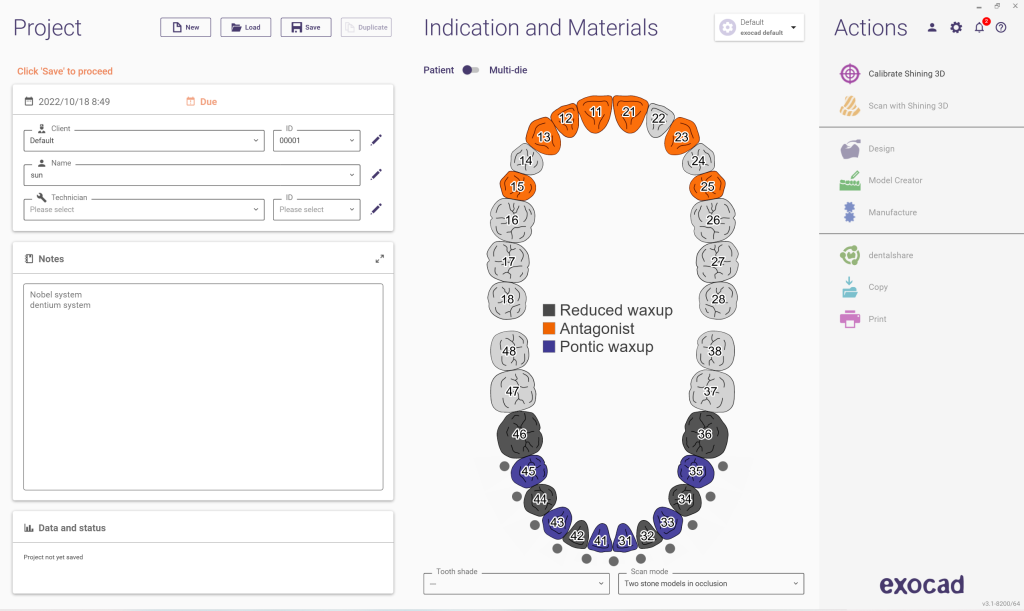
Fig 5:Create order in software.


Fig 6,7,8: Scan the model with AutoScan-DS-MIX dental 3D scanner. Due to the large angles of #32 and #34, the scan bodies can collide with each other. So install the scan body of #34 first and scan. Then replace it and install scan body of #32 and get all the data by using the add-scan feature.

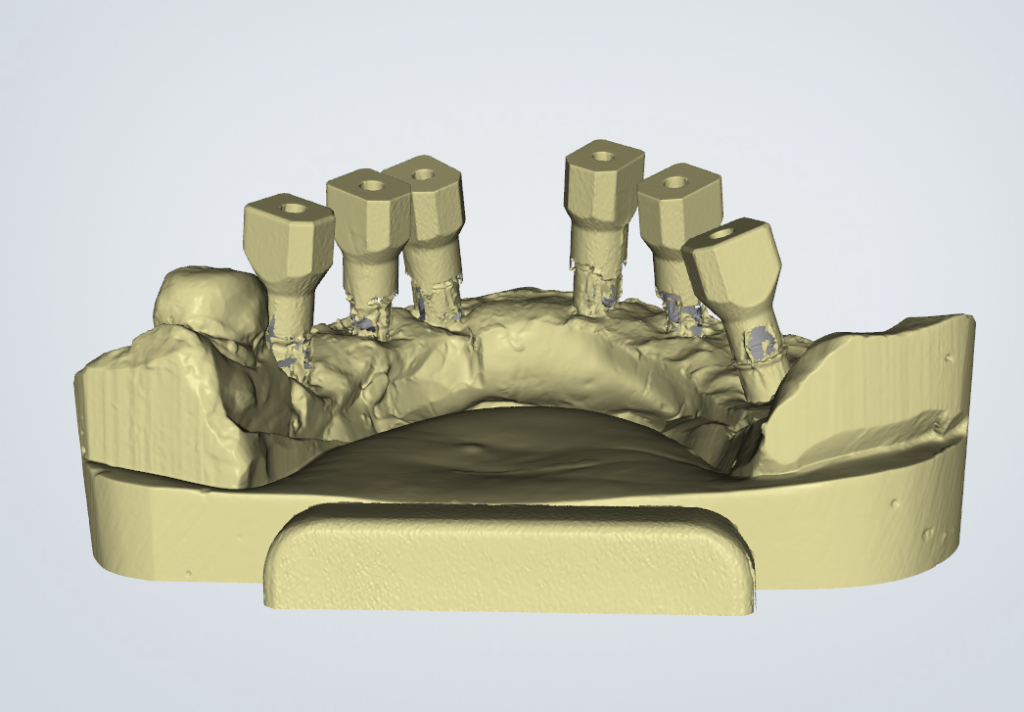

Fig 9,10,11: AutoScan-DS-MIX’s exceptional scan performance, featuring 2*5.0MP high resolution and ≤7μm high accuracy, guarantees reliable scan result, which will largely improve the design & production efficiency.
1.2 Exocad Design – Matching in exocad
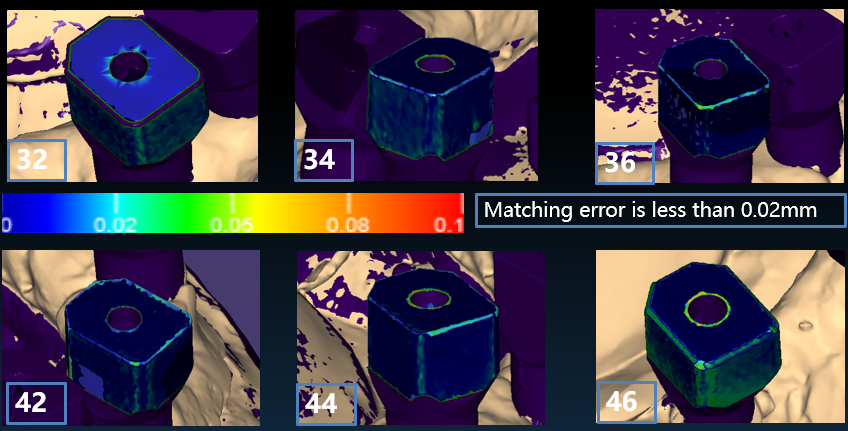
Fig 12: It showed from the color bar that the matching error is less than 0.02 mm.
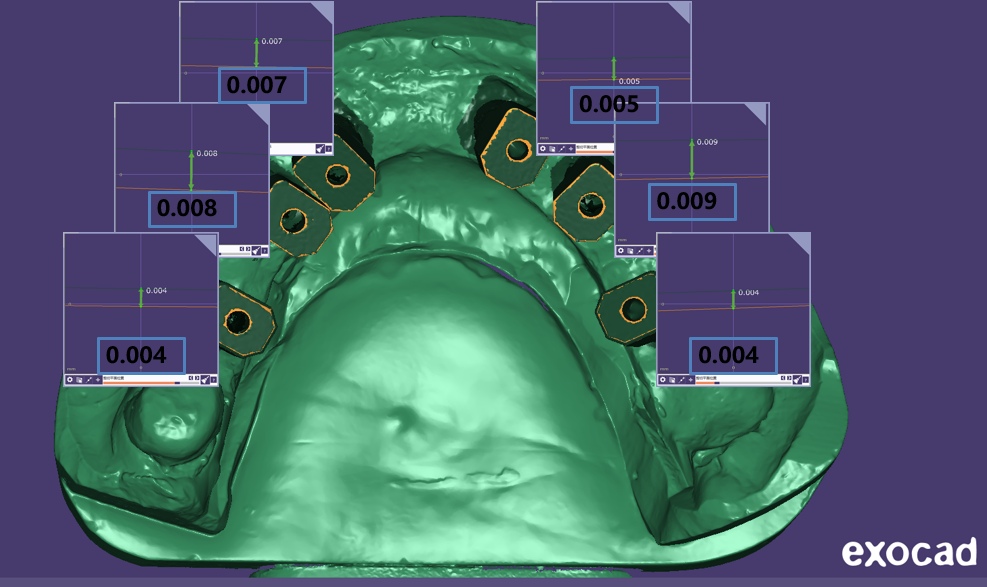
Fig 13: All the matching errors of scan bodies are less than 0.02 mm

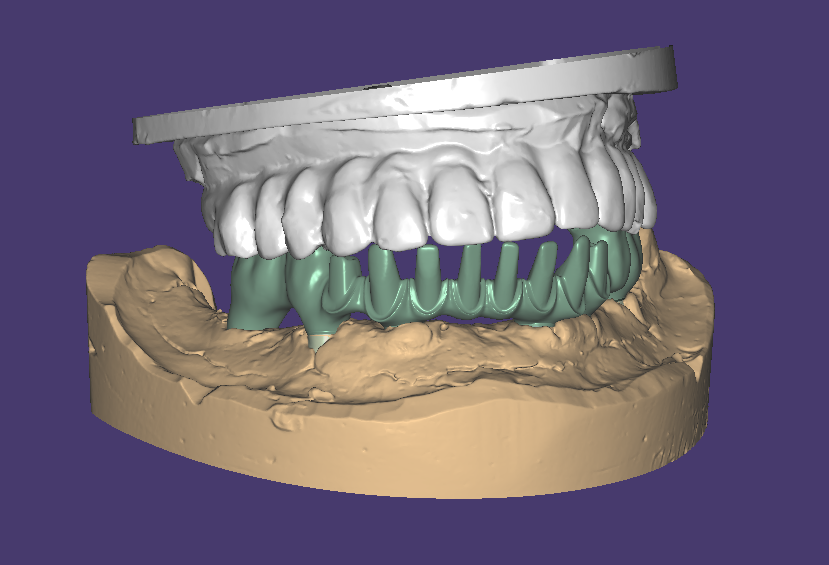

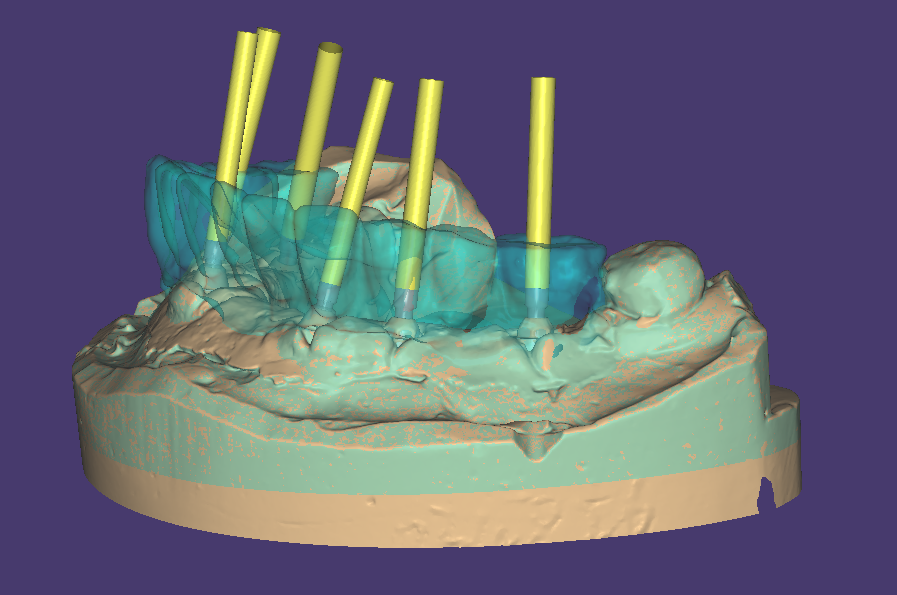
Fig 14,15,16,17: Design the Toronto bridge in exocad
1.3,Milling

Fig 18: Milling the Toronto bridge with a milling machine.
1.4, Completed the Toronto Bridge
Based on ideal scan results with excellent CAD designing and milling, the bridge fits perfectly on the model.
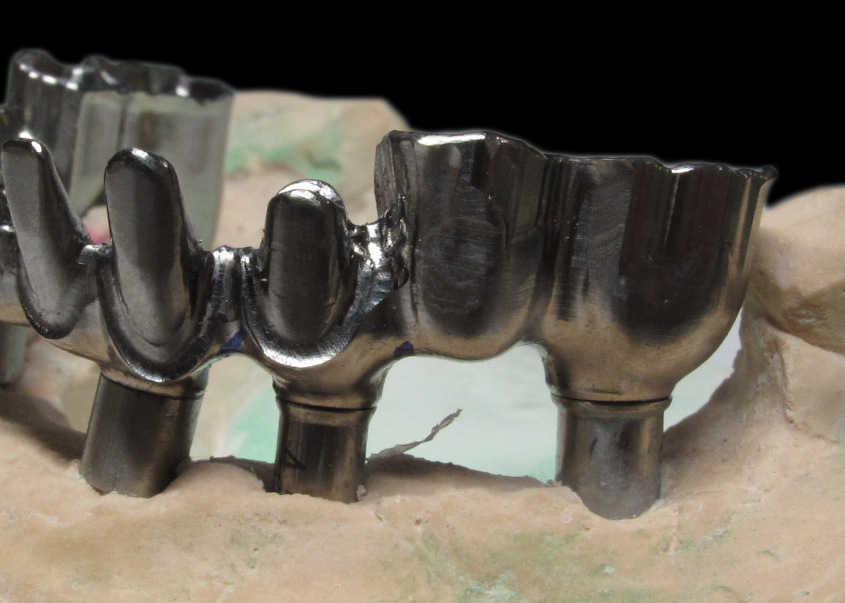

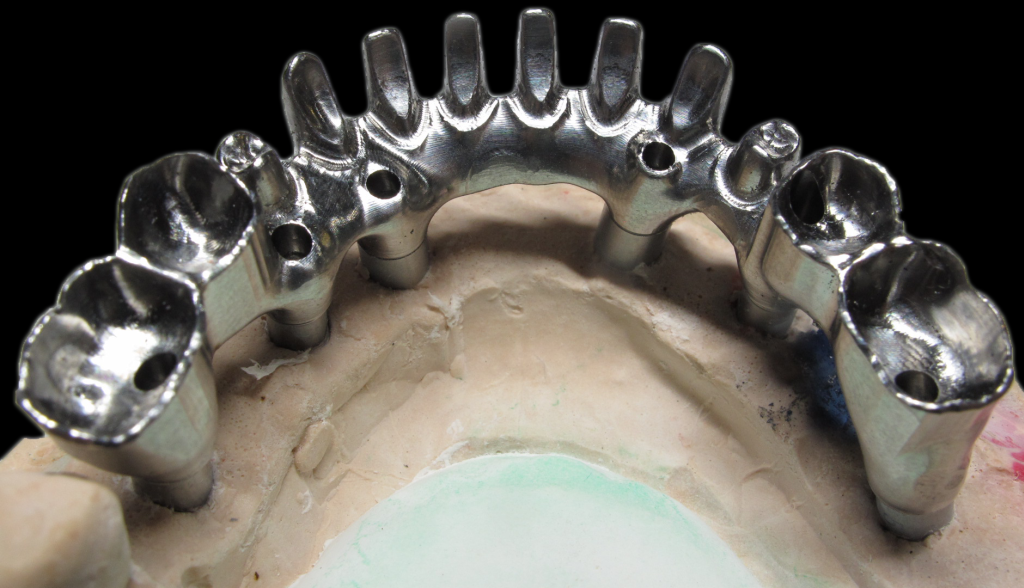

Fig 19,20,21,22: The pictures showed the fit situation of the Toronto Bridge on the model.
1.5,Post-processing of Bridge
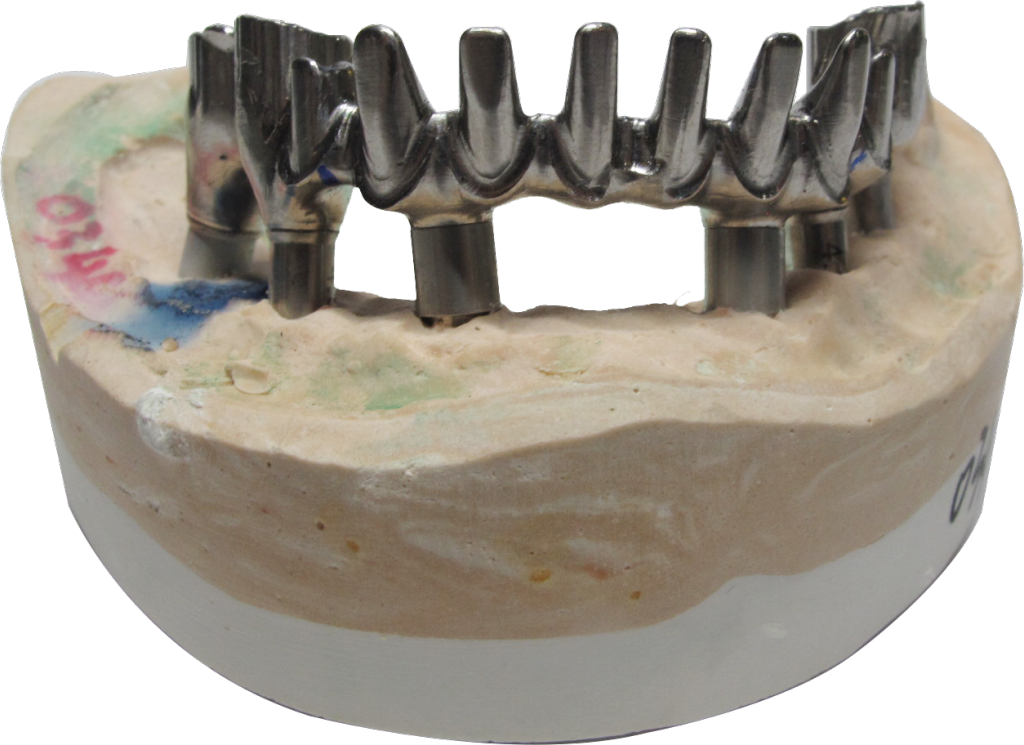
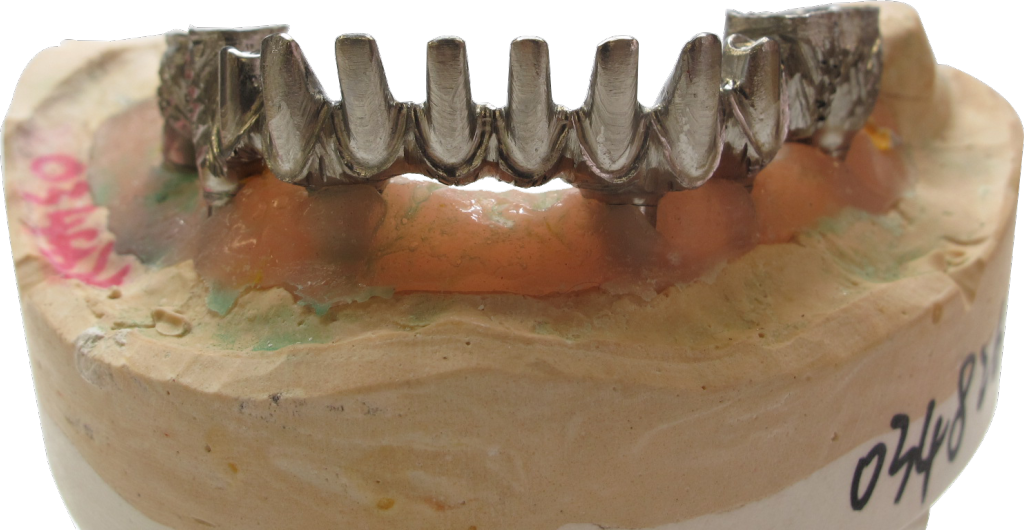

Fig 23:Try-in; Fig 24: Metal grinding; Fig 25: Build up opaque
2, Make the superstructures
2.1, Create an order for superstructures in software
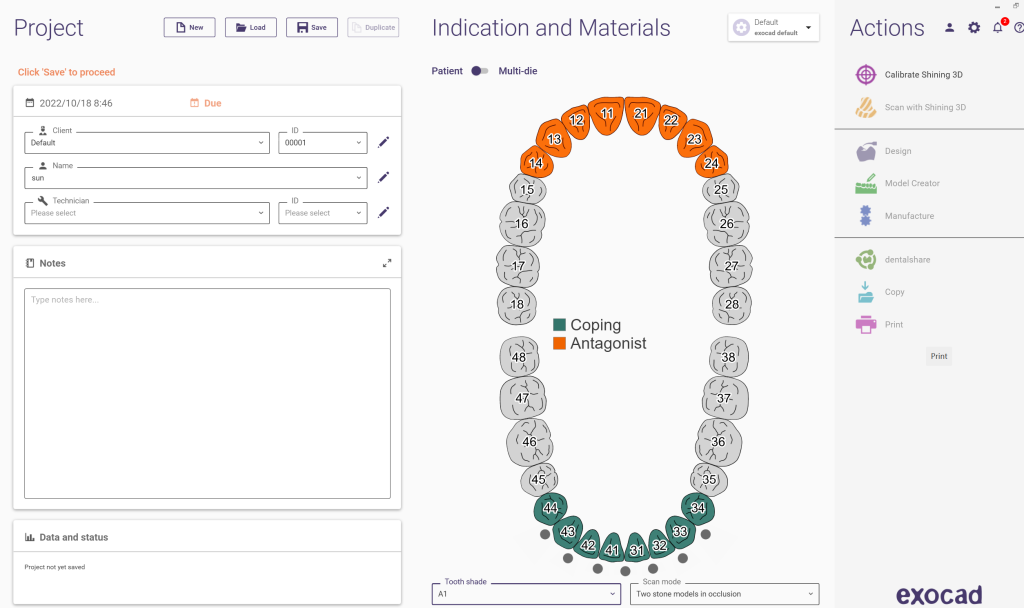
Fig 26: Create order with #34~#44 were PFM crowns.


Fig 27,28,29: Scanning with AutoScan-DS-MIX dental lab 3D scanner, all the details were perfectly recorded.
2.2, CAD Design with exocad


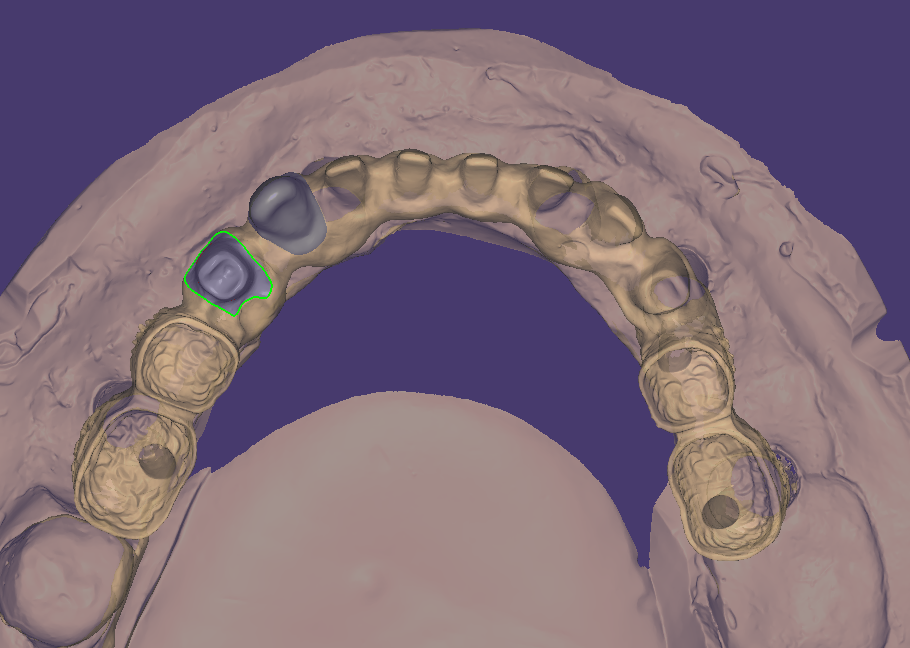
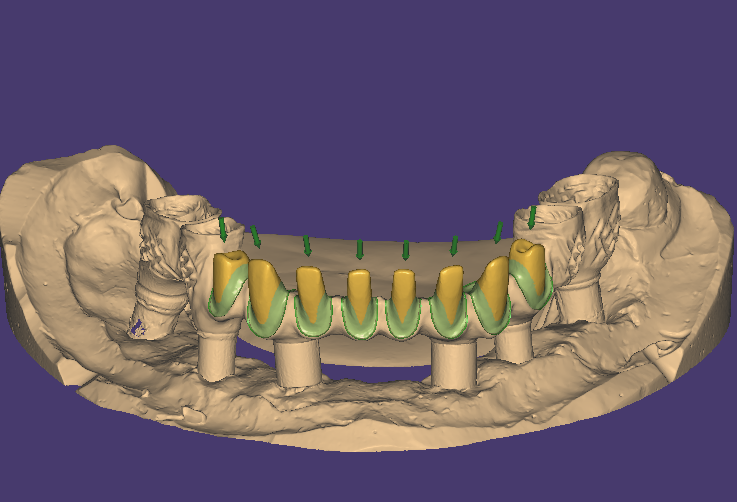
Fig 30,31,32,33:In this case #34~#44 were ceramic crowns, #35~#36, #45~#46 were solidex resin crowns with gingiva,they were all designed using exocad.
2.3, Post-processing of Superstructures
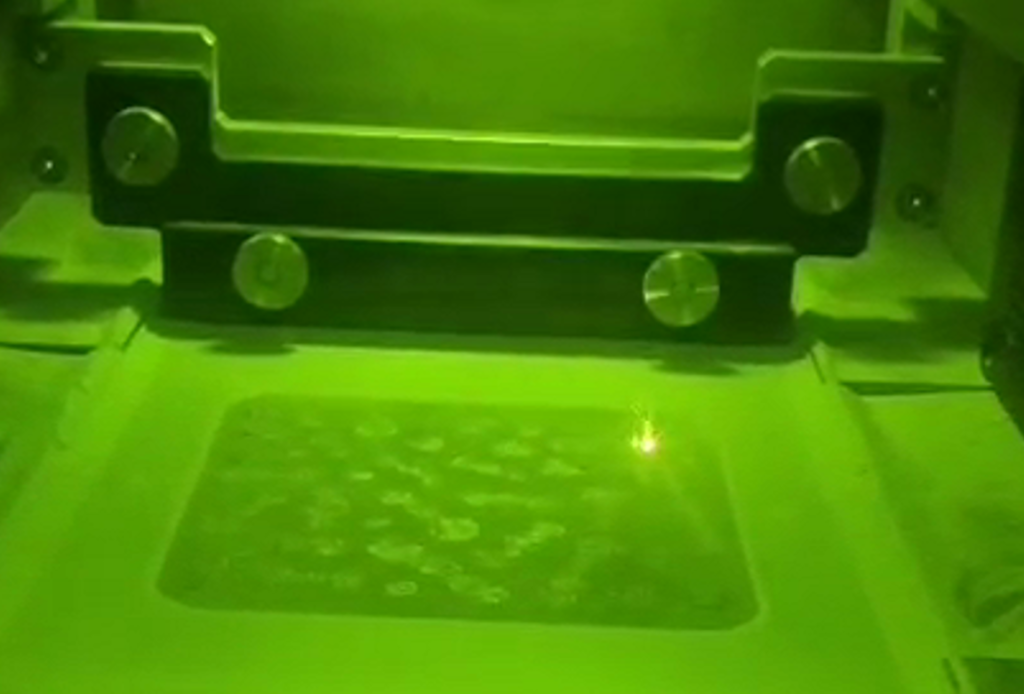


Fig 34,35,36: Printing and grinding


Fig 37,38,39: Ceramic building and grinding
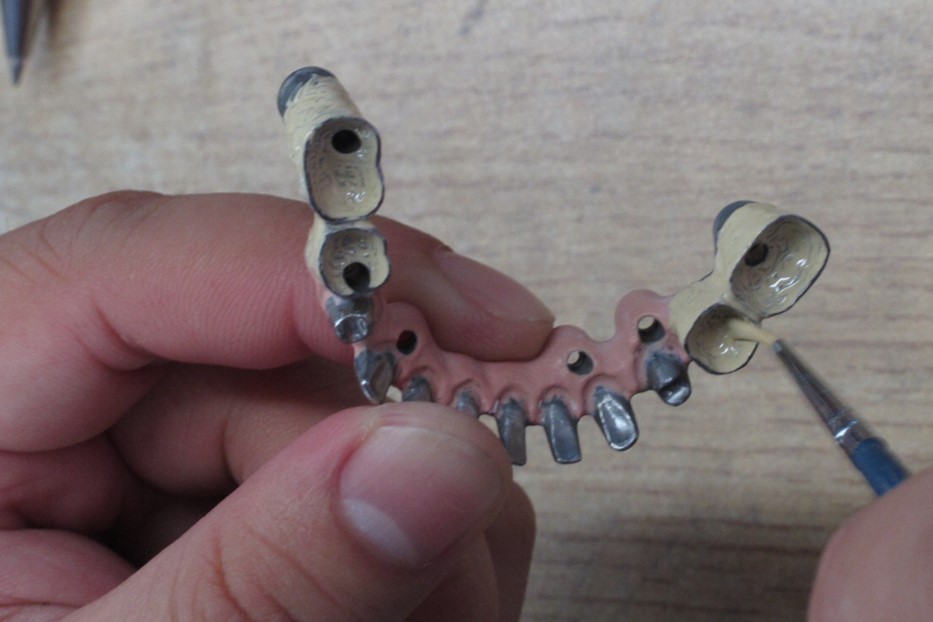

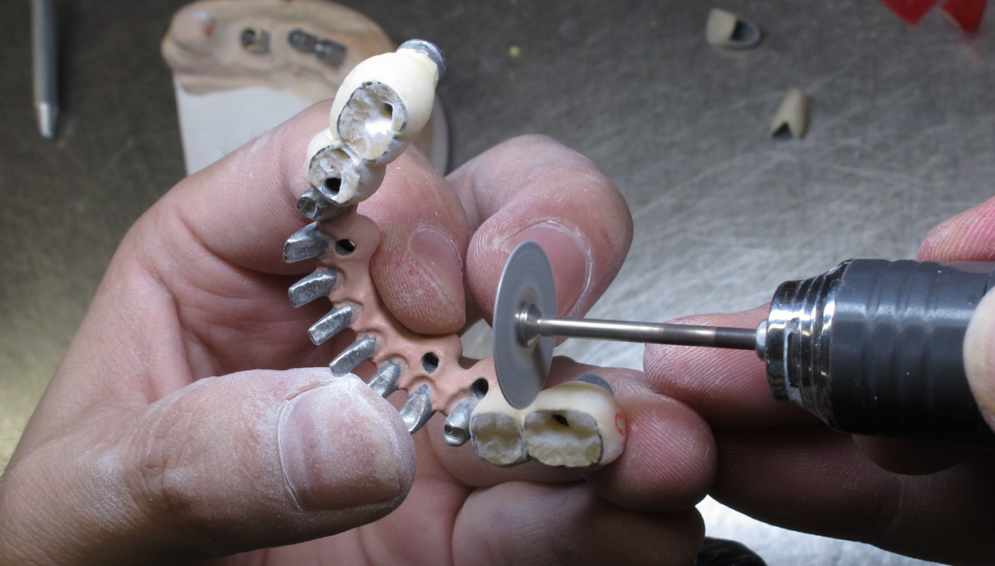
Fig 40,41,42:Complete solidex resin crowns


Fig 43,44:Complete gingiva
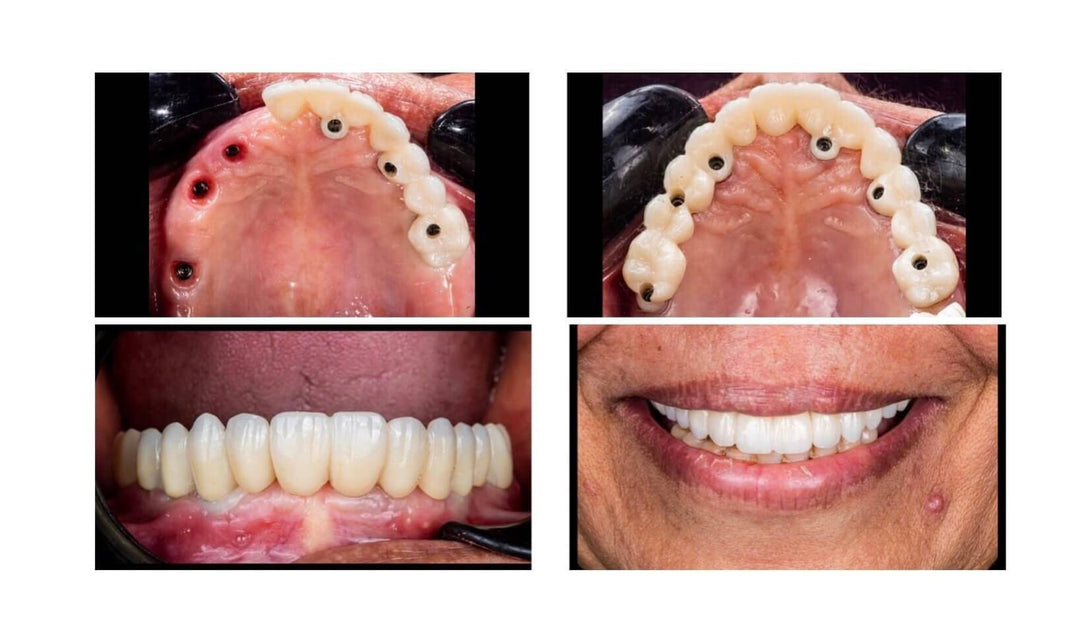
3, Completion the whole case with Toronto bridge


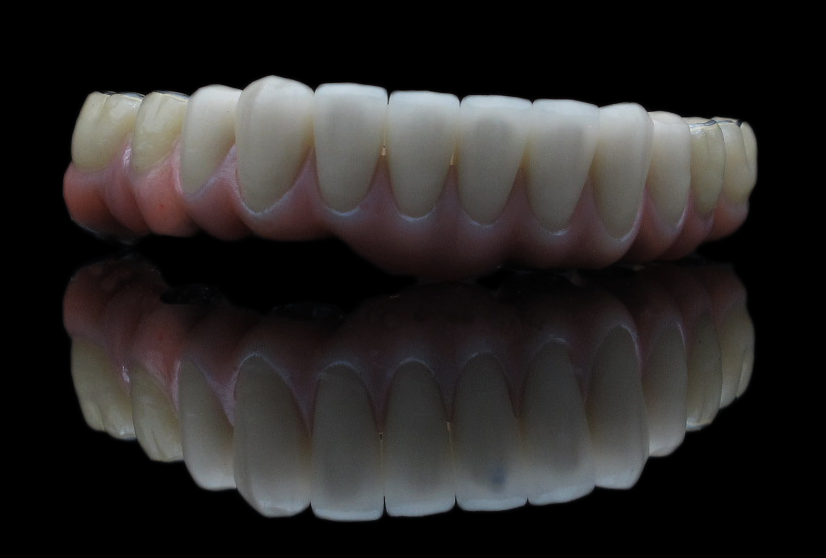

Fig 45,46,47,48:final completed Toronto bridge restorations fitted in model.
Summary
In this case, the dentist would like to reconstruct the occlusion with the Toronto bridge and upper restorations on the implant bodies. The quality of the scanning data is extremely important in such cases. A slight deviation may cause the Toronto bridge to fail to place completely in the mouth, further leading to the long-term instability of the upper restorations. AutoScan-DS-MIX dental lab 3D scanner features excellent detail, brilliant precision, and high efficiency; it can be widely used in dental indications such as implant abutments, implant bar pillars and implant bridges.


Leave a comment